Explore our industry-leading range of innovative products for the construction industry
To order a product or to ask us a question, speak to our team on 0208 916 2222 or use the live chat facility in the corner of your screen. Alternatively, fill in the simple form below and we will endeavour to respond within 48 hours
Name
Company Name
Telephone
Email Address
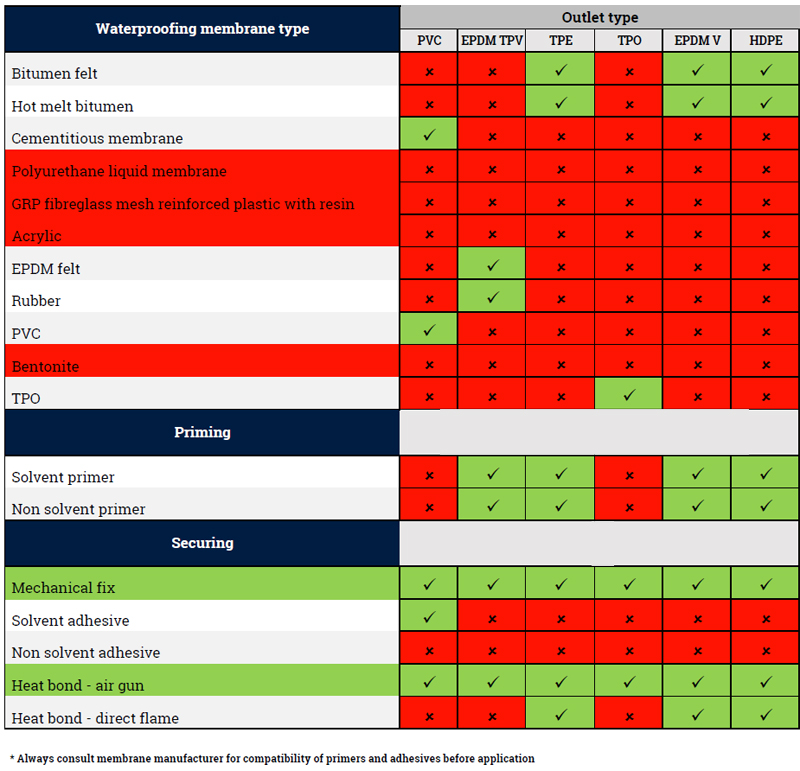
Product—Please choose an option—Supports for Paving & DeckingGreen RoofTimber TilesiDeckingProtection & DrainageOutlets
If other, please specify here
Quantity (units)
Area Dimensions
UrgencyImmediate1-2 weeks1-2 monthsSpeculative enquiry
Preferred method of contactCallEmail
Comments
I agree to Wallbarn storing my data and contacting me for marketing purposes in the future.
Please see the Website terms & Conditions at the bottom of the homepage
 Next Day Delivery order before 2pm Order / Enquire Now Call 020 8916 2222